I remember that day, whenI was still new to amigurumis, I was making a cute little doll from a pattern… I loved it, the instructions were very clear, it was turning out really good,… Until that single sentence in the assembling part : “If you’d like to make your doll poseable, you can add wire in the arms and legs [period]”. I turned the page over, looked for more explanations or pictures, then realized that the period was actually a full stop and that my little doll would sadly stay sluggish forever because I had no idea whatsoever how to do that.
After that first experience, I’ve always been a bit scared to use wire in my work. It seemed really complicated and totally risky to me.
Then, little by little, I tried again. And I have to admit, I’ve known bitter failures. That’s how I learned that it’s better to keep the wire connected, because a bit of wire in the right arm, and a bit of wire in the left arm? They just don’t stay where they should ! And if your aim isn’t to make a stop motion movie where your doll would suddenly be stabbed by a stake…That’s not what you want to do.
Now, when I make patterns where wire is involved, I try my best to illustrate the process step by step with as many pictures as needed depending on the pattern.
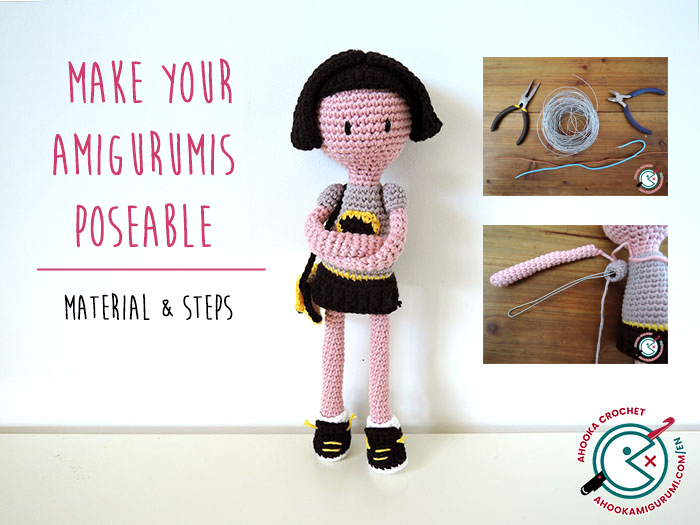
Today, I’d like to show you a method you can apply to almost any doll you’ll be making.
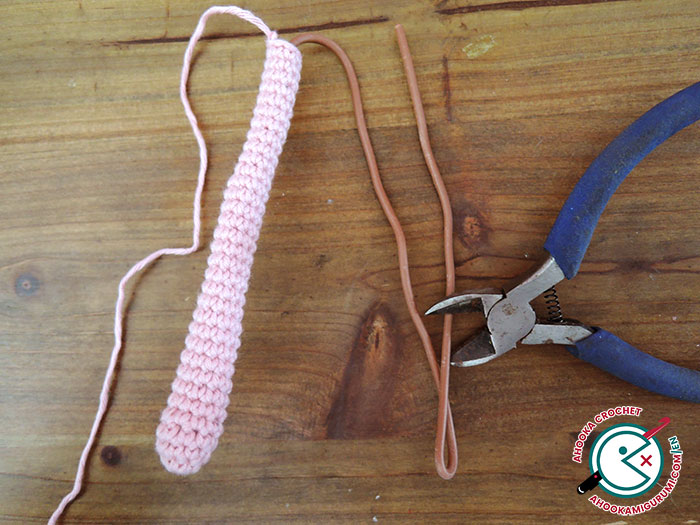
1. The material
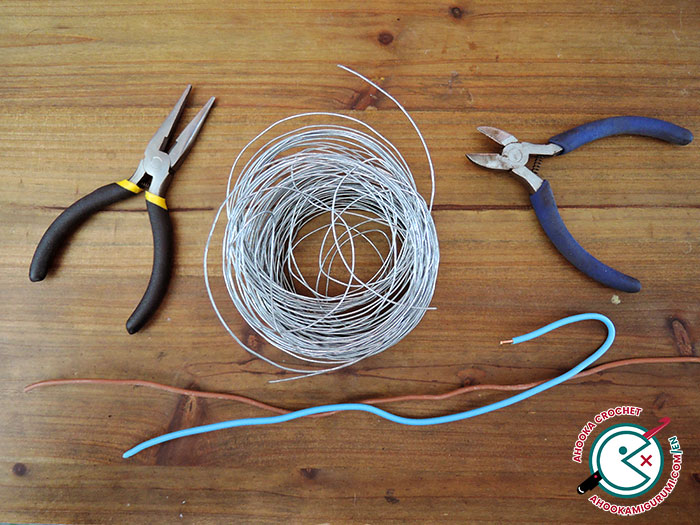
► Simple wire or electric wire : I tend to use both of them as they both have their benefits.
– the simple wire is thinner so it will help in smaller areas. However, keep in mind that it is breakable so it will be less resistant. You can find it in different size.
– the electric wire is made in copper wrapped in plastic sheaths. It is thicker and way more resistant. It exists in a lot of different colors which is cool because you can use a color matching your doll if you crocheted it a bit on the loose side. You can find it in any hardware store.
► Cutting pliers : especially useful for cutting the electric wire to the desired length.
► flat-nose pliers : not mandatory but very useful for bending the ends.
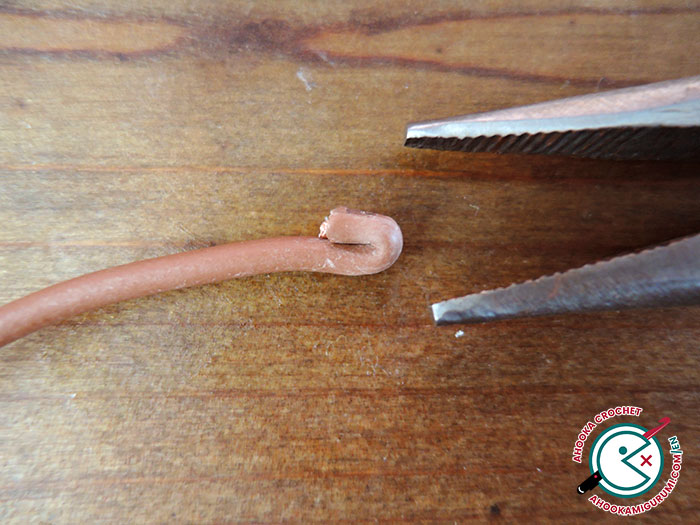
2. Create the wire skeleton
– Start by bending one end of the wire according to the size of your doll leg.
– Insert it in the first leg then reckon the length you’ll need for the second leg and cut it (don’t bend the other side yet).
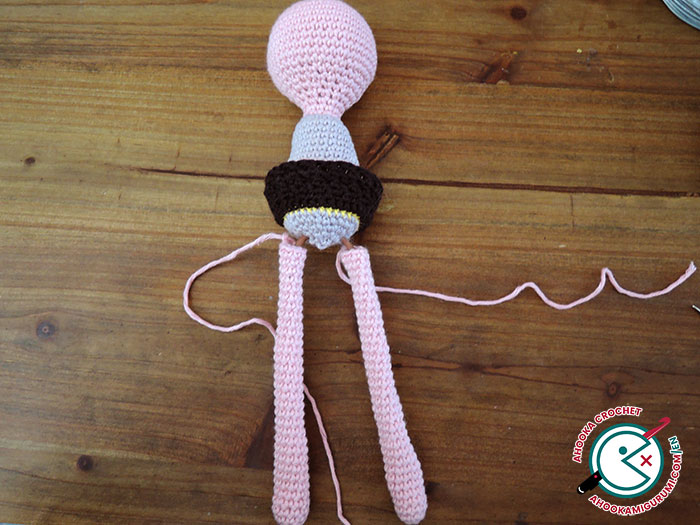
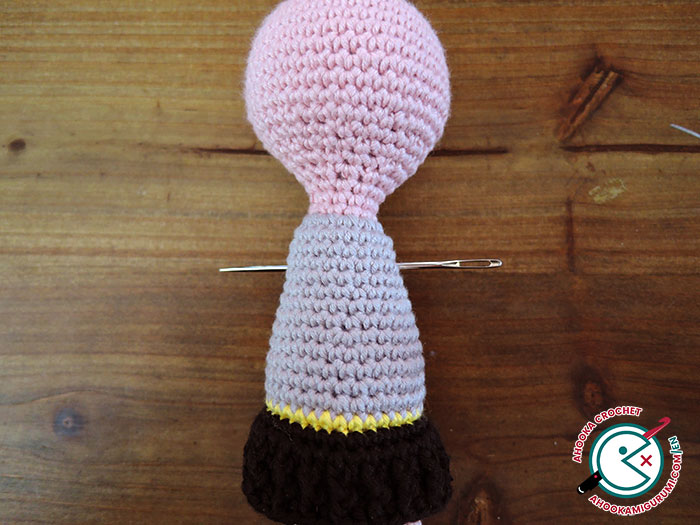
– Insert the wire at the bottom of the body for the legs (see below for the arms).
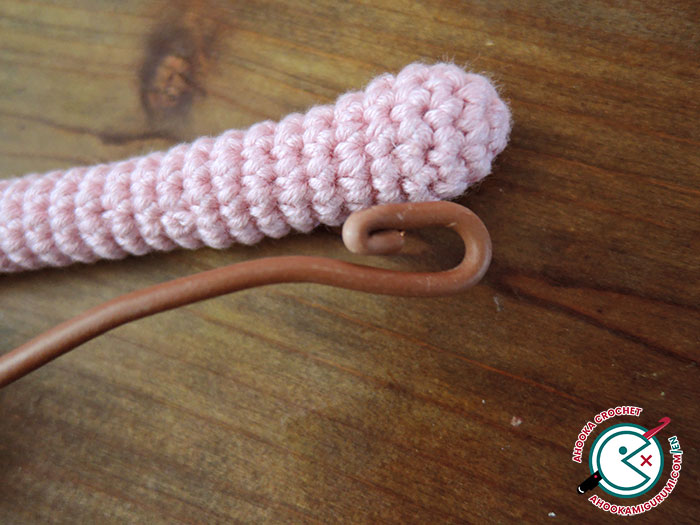
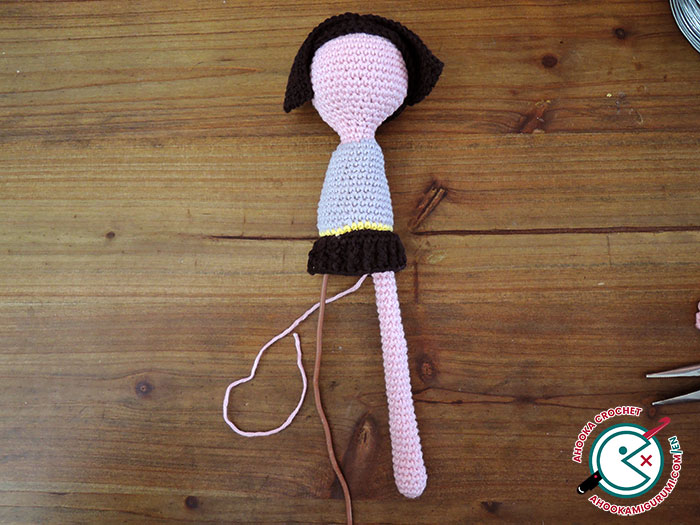
Your doll should look like this now:
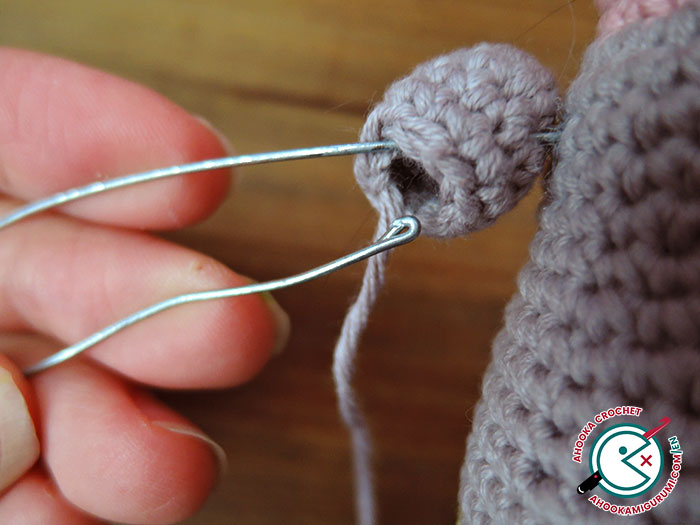
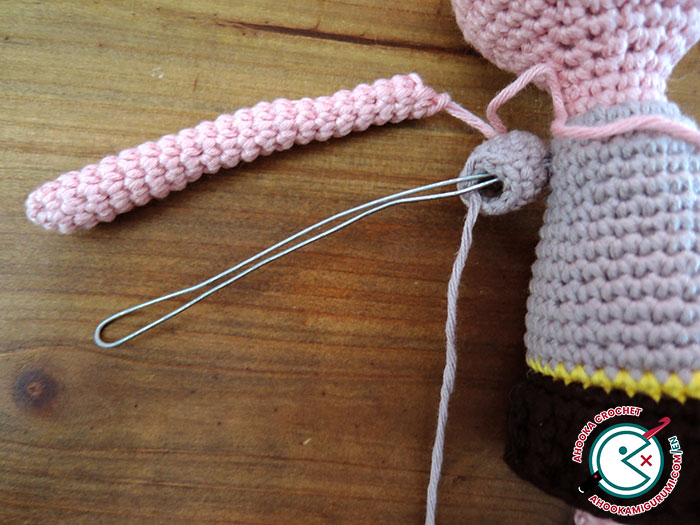
– Now fold the second end of the wire to fit the second leg’s size.
– And insert it.
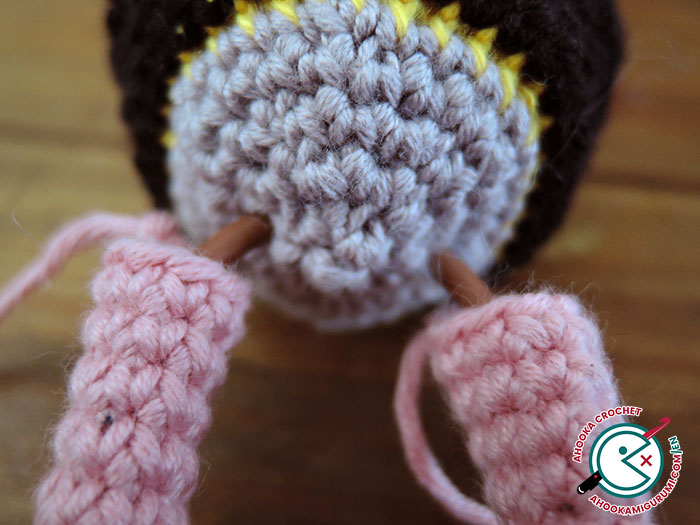
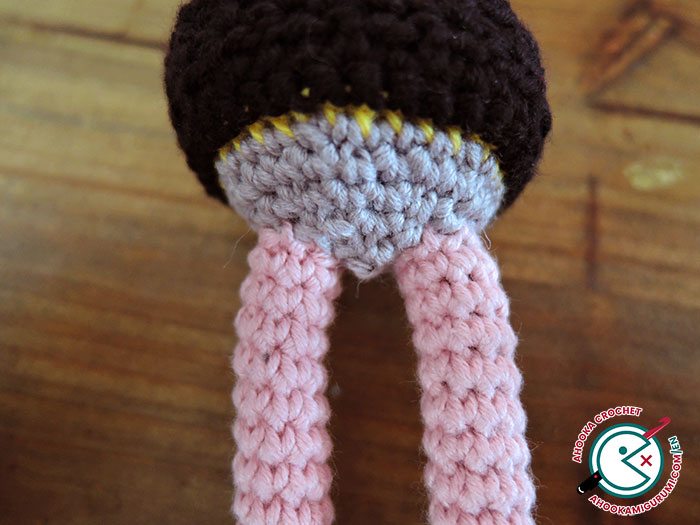
– Then, sew the legs in place.
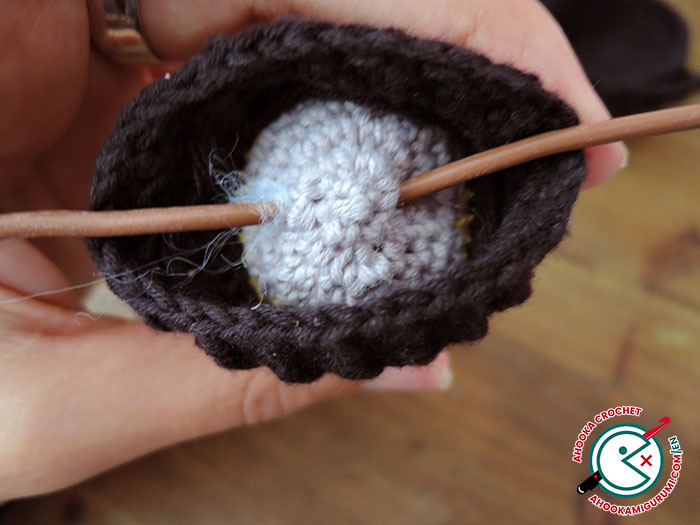
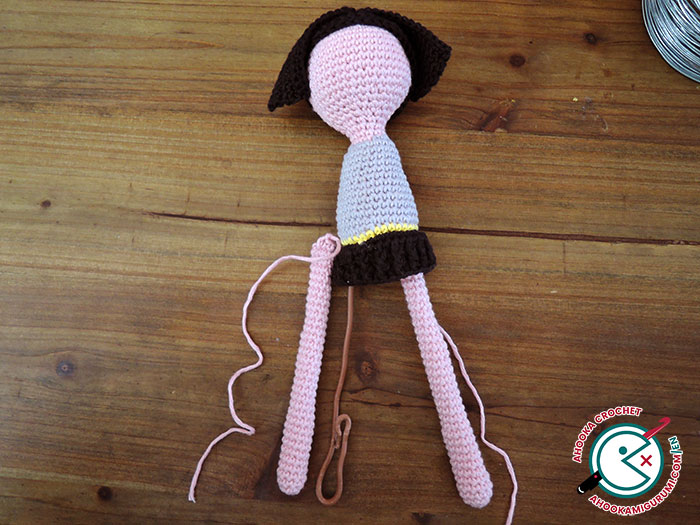
As for the arms, proceed the same way. However, as you have to go through the body from one side to another, it can be a bit more difficult. The wire will push the stuffing and put it out of shape. In order to avoid that, prepare the way with your needle before inserting the wire.
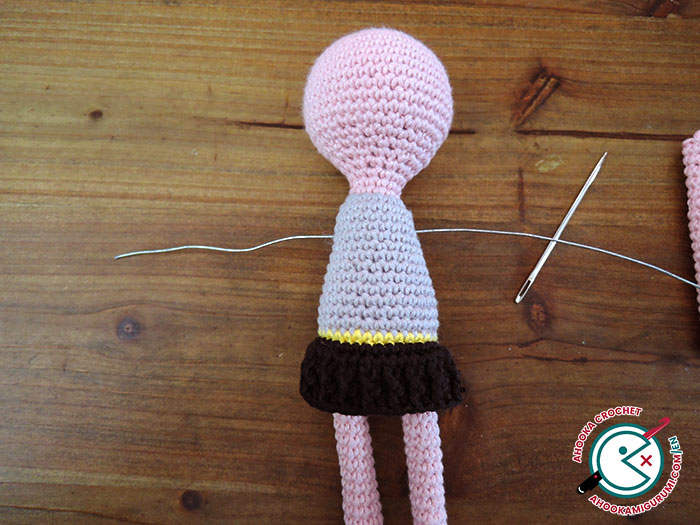
If needed, double the wire. Don’t forget to bend the end.
Proceed the same way for the second arm as for the second leg and sew in place.
You may have noticed that I didn’t talk about stuffing. There is a reason to that : I didn’t put any.
When the pieces in which you have to put the wire are too thin, it can be very difficult to put the stuffing in. If you put it before the wire, you’ll have trouble inserting the wire. If you put the wire first, you’ll have to stuff around it, making sure to keep the wire in the middle.
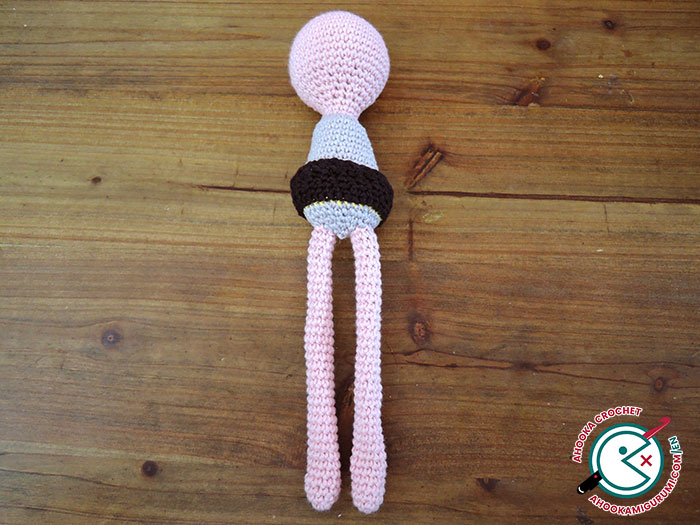
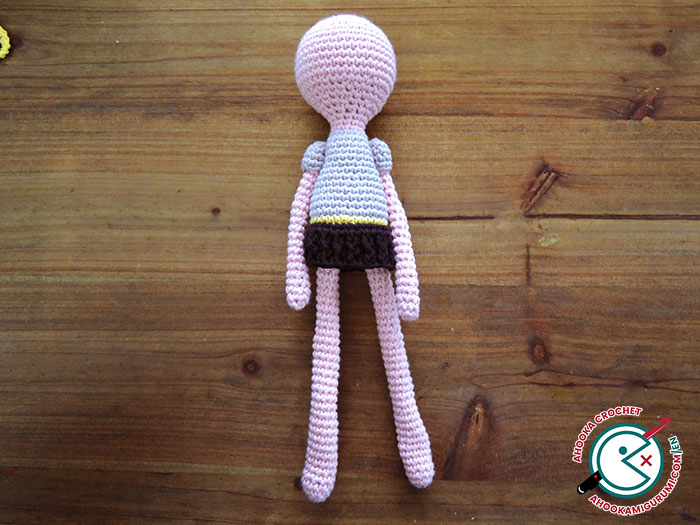
Do that if your pieces are big enough, but when they are thin, simply adjust the size of the wire and don’t bother about the stuffing. See for yourself, would you have noticed that the arms and legs of the namdoll weren’t stuff?
3. Playtime !
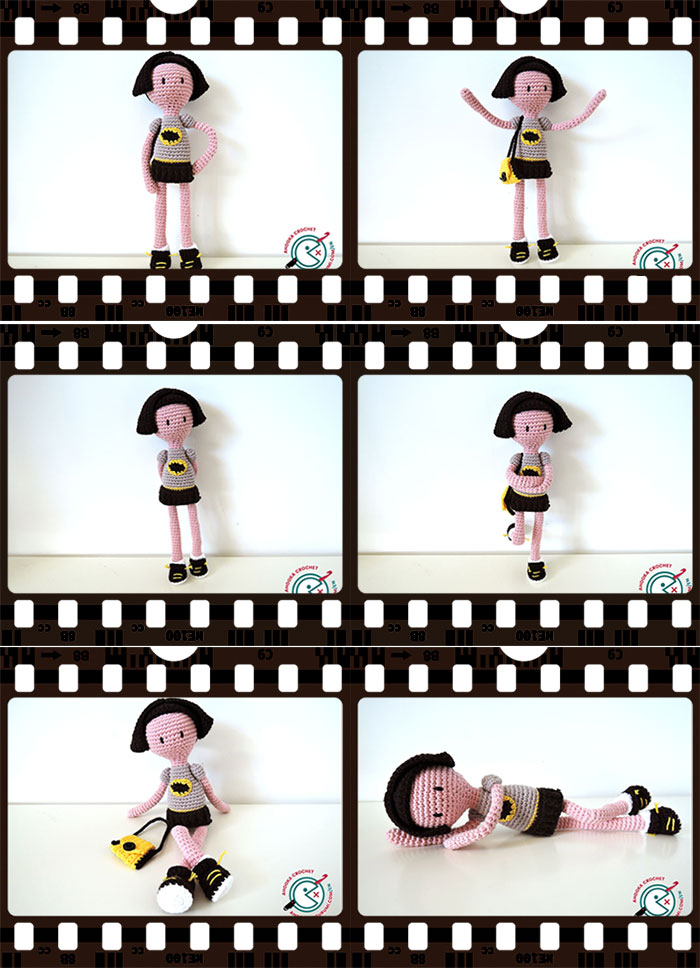
And that’s it !
(Be careful, avoid putting a wire skeleton in dolls intended for small children !)
Pattern : Bat Namdoll
It would be so absolutely wonderful if you were to put a PRINT button on your blog so that subscribers could save your clever articles and creative ideas. I know how to save the “poseable” tutorial to my laptop, but it’s rather a pain to do so. Yes, I know that there is a PRINT button for your patterns, but please think about a way to permanetly save your tutorials and advice for future reference. Thanks, and keep on hooking!
@ Rita Lyons, do you mean the green Print Friendly button?
You can make them yourself at
http://www.printfriendly.com/
Works fine!
I’ll think about it Rita, thank you for your advice :) And thanks a lot Her for your answer ! This is super useful !
Thanks a lot for the tutorial!
Always wondered how to… I sure will try this!
My pleasure !! Let me know what you thought about it ^^
OMYGOD thank you!! Got your email and I LOVE this idea! I’ve always wanted to try this with my dolls and your instructions are so clear and love your doll and pics. Thank you for sharing. ☺
My pleasure Aida! I’m super glad this helps !
I want thank you and let you know how much I appreciate you for all of your tutorials. They are easy to follow and exceptionally written. And thank you for the “green print button” link, I normally find another way to print, but this will make things easier.
My pleasure Mary-Frances, thank you very much for your nice comment ! :)
I’m absolutely trying this with my next doll. Thanks so much for the tutorial!
Mt pleasure ! Let me know how it went :)
Thank you very much. Very few patterns contain anything in the way of instructions for this, other than.. “Insert wire and stuff”, let alone which wire to use!
I’m new to ‘poseable’ amigirumi so it’s been a nightmare for me.
Much love xx
I know right? That was bothering me too ! :) Good luck with your future poseable amigurumis :)
I made a Oogie Boogie for my son so I didn’t put wire in him, but have always been disappointed with how the top of his head should fold over instead of staying straight up. Thank you for the detailed tutorial. Once my littles are big I plan to remake him and many more Amigurumi dolls with wire. ?
Great ! You’ll see how fun it can be ! Your amigurumis seams alive when you can pose them ! :)
Great tutorial, thanks
My pleasure ! :)
Thank you so much for sharing this, never would have thought to use electric wire!
My pleasure Patricia ! I don’t think I would have if my boyfriend hadn’t use any… But then I saw those spare ends and thought… “That could be useful” :D
Hi, please check an youtube channel with free tutorials how to make a doll with a wire frame inside, how to do a hair or a face for a doll. All videos have English subtitles. Technique shown there looks very similar to yours one, but with few little hints.
Thanks Alex
ThI was so afraid to use wire in my dolls but your article explains alot in easy ti follow details. Thanks for sharing.
My pleasure Rai !! :)
This is by far the most helpful post on the internet! Thank you for taking the time and sharing….i was actually looking for how to make a doll freestanding? Did u write an awesome article about that too? ?
Thank you very much ! :) Unfortunately no, I don’t have a tutorial for freestanding dolls, but the general rule would be to make them poseable and give them large feet. A little bit of cardboard in the feet may help too !
Hope this helps :) See you !
I loved your tutorial and the idea about using electrical wire was genius. What gauge did you use on the electrical wire?
Hi Shellie, and sorry for the late reply !
I don’t remember the gauge I used, but I have several and adapt it according to the size of the amigurumi I need it for. I hope this helps !
See you soon !
You answered my questions about how to make the wire frame for a crocheted doll and also my confusion about stuffing (which the pattern I had didn’t address at all either!) Thank you very much for taking the time to post this on the internet for the rest of us.
My pleasure Burcu ! I’m glad that helped !
Thank you very much. The photos and kind explanations made it easy for me to understand.
Great ! Thank you !! I’m super glad about that :)
Great help! But what gauge wire, for the thin wire, do you recommend for these types of small figures?
I usually use recycling material and it doesn’t really matter as long as it fits in the doll and is strong enough to be bent multiple times ! I’m sorry it’s not very precise, and I hope it help anyway ! Happy crocheting ! :)
This is great information. But what size/gauge??
Is Beadsmith 18-Gauge Aluminum Craft Wire, good for small animals?
Thank you very much for the information and help.
This is so adorable :) Thanks for this post!!
Please make these instructions printable. I so want to try it, but need specs on size and type of wire.
Thanks sooooo much, i am just a kid of 11 and i don’t really like playing with handmade dolls as much as i like making them. I tried to make a wire doll for my sisters but it all went wrong.but with this i think i am GOOD to GO!!
I just wanted to let you know that you are awesome for making this tutorial! I’m working on my first amigurumi project right now. I had no idea how I was supposed to add wire to my project. Thank you so much for your time and kindness! It is much appreciated!!
This is hands down the BEST tutorial on wire in dolls that I’ve read!! Thank you so much!
Thank you! That is so helpful and just what I needed! Very clever! I’m off to B&Q tomorrow to get the electric wire 🤗
THANK YOU Anooka. I’m learning Stop-Motion animation using amigurumi dolls and your tutorial is perfect for this.
And I love your dolls by the way. I’m very happy to have found you.
This is genius advice! I shy away from stuffies with very small arms/legs because they really are a pain to stuff! This changes my whole outlook now! I have used wire in some things & you are correct… it doesn’t stay put! But this method will solve all that! Ty!
Thank you SOOOO much for making this! I have been searching everwhere for just a BASIC walk through of how this is done. I’m also trying to incorporate it in a crown pattern I’m trying to make for my dog’s birthday coming up :) So again: THANK YOU! :) <3
This was super helpfull THX!!!!
I was just wondering…..
Do u think i could use pipe cleaners as well???
Once again THX to much!!!!
This is so helpful – thanks. I am new to this and my pattern just says you may want to use a wire frame to make your character poseable – no further explanation!
I have looked at lots of your site – its very useful.