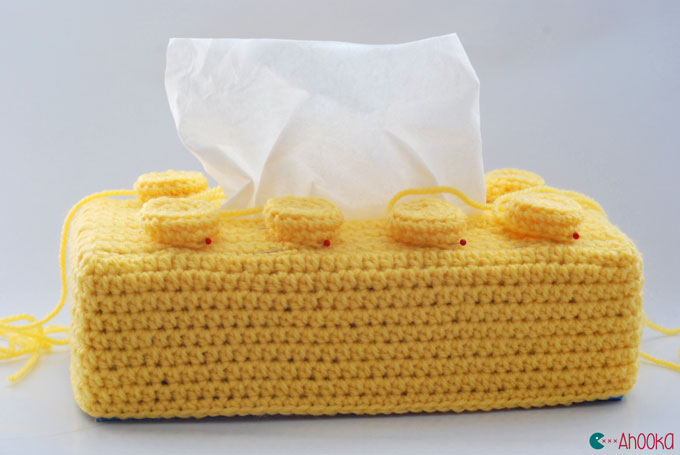
Achoo !
This is my daily routine !
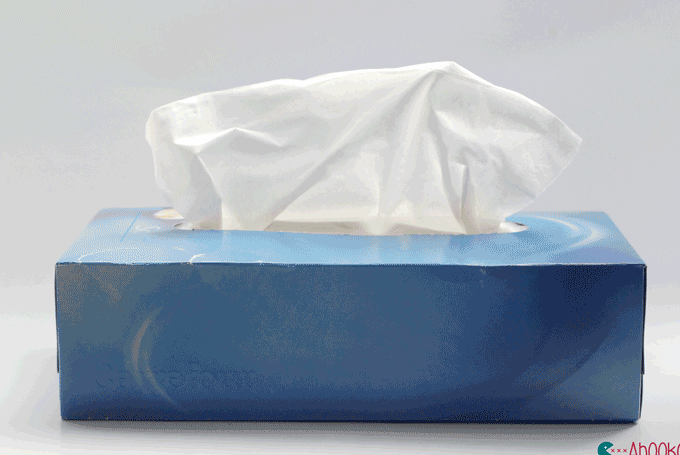
I’m allergic to a lot of different things, and not a day goes by without a sneeze. I live very well with it, but the main issue is that my house is full of tissue box eeeeverywhere. In the bathroom, on my bedside table, on my desk, here and there,… And I couldn’t stand those same old blue bloxes anymore !
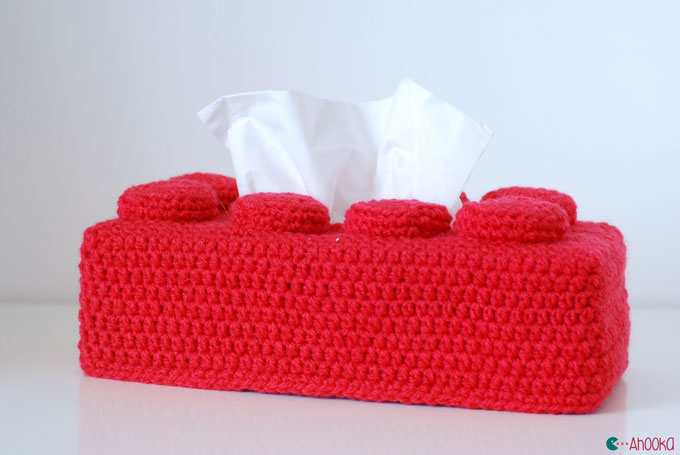
Then, I ran into these :
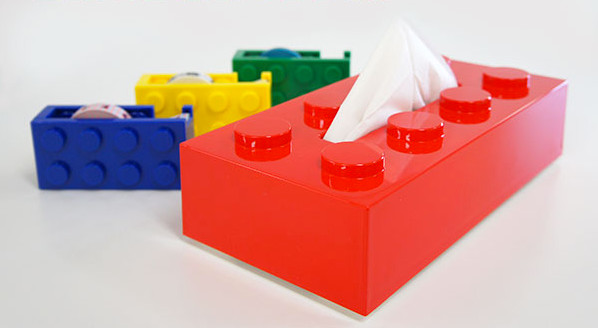
And of course, I had to make that with my crochet hook, RIGHT AWAY.
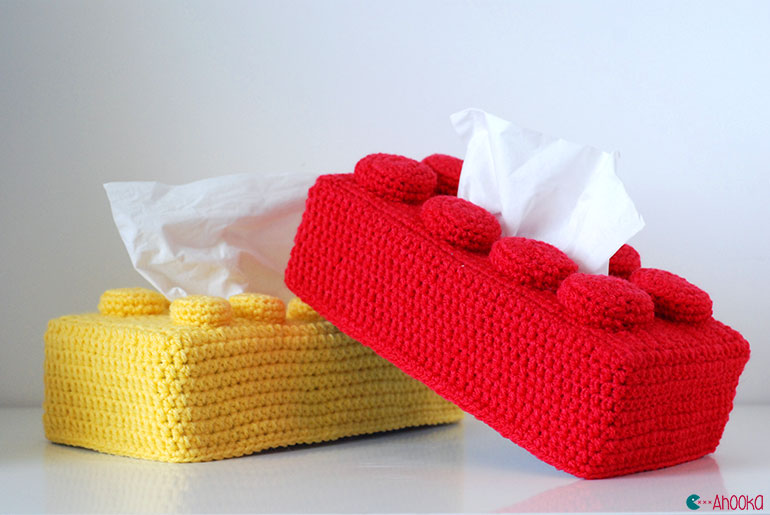
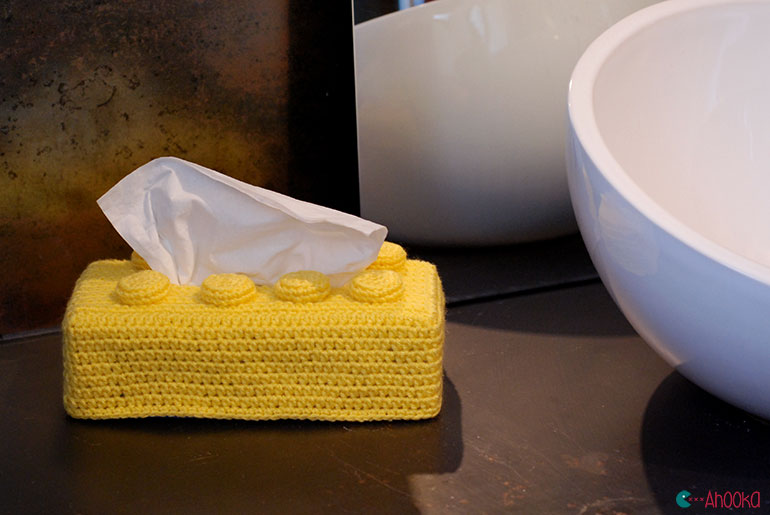
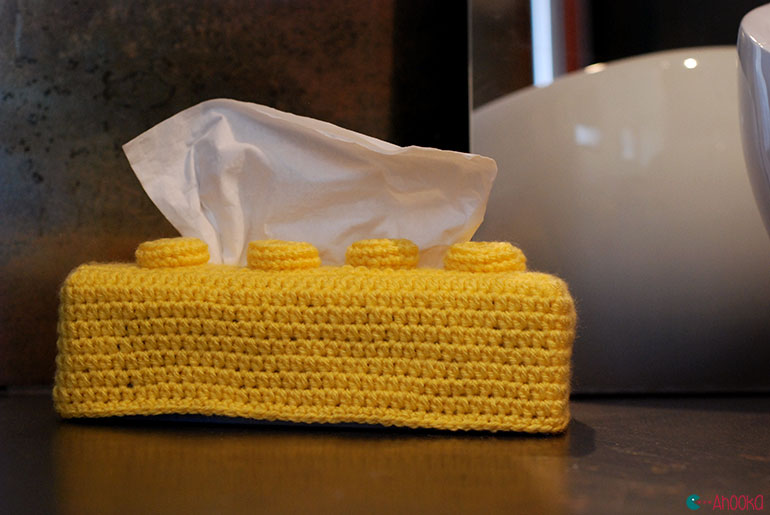
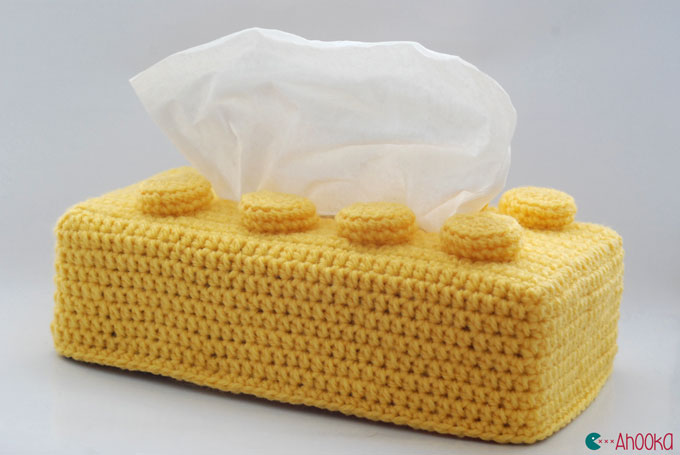
One for the bathroom :

And one for my desk :
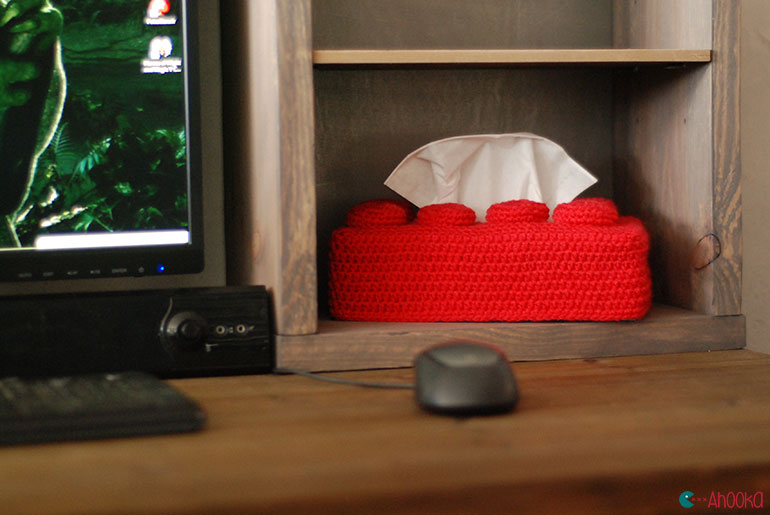
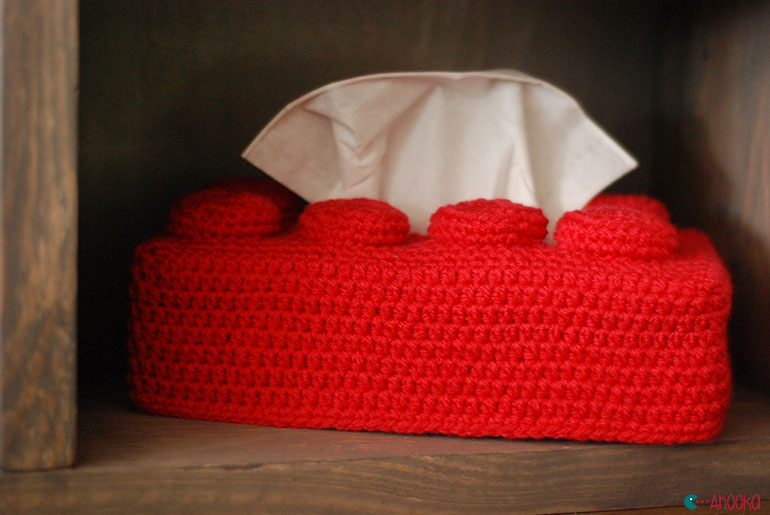
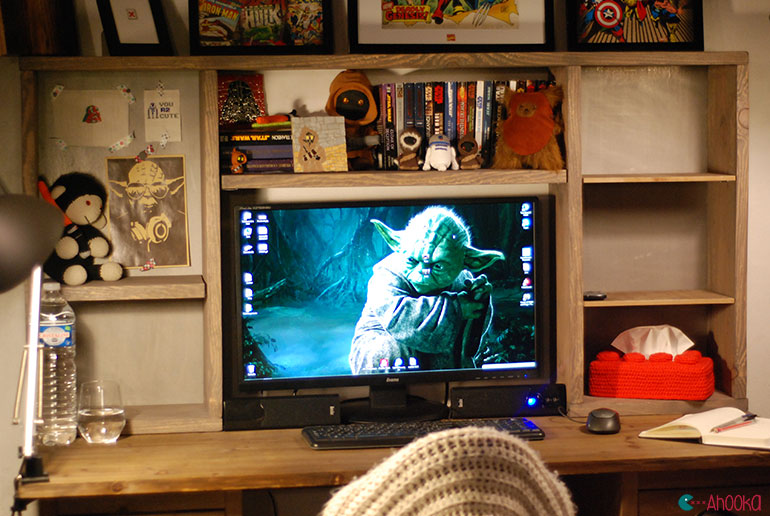
No doubt that there will be more of these soon :p
But no more talking, let’s make one together !
This isn’t a pattern but a tutorial so that you can make it with any type of yarn you want.
I used some acrylic (without brand) and a 3mm crochet hook (D/3), but any orphan skein of yarn will do !
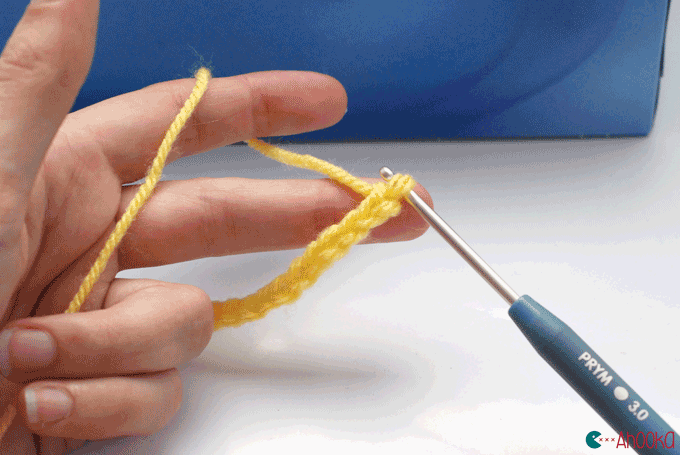
1. Make a starting chain the same length as your box + 1 chain to turn.
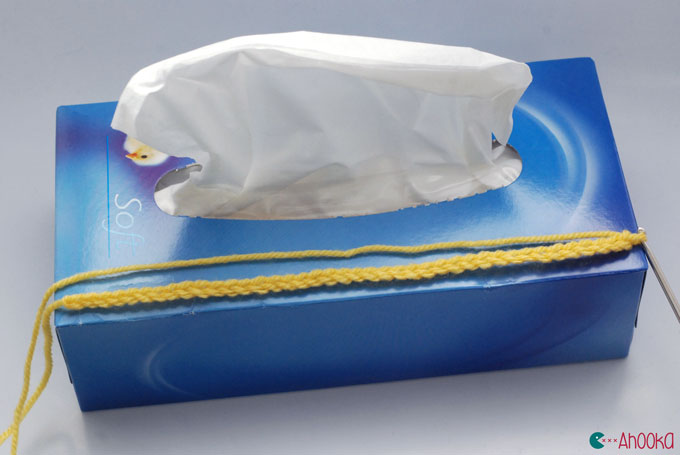
2. Single crochet in the second chain from the hook, and in every remaining chains. It’s better to single crochet in the little “bump” on the back of your chain. It’s a little bit harder to find, but the result is much neater. (watch this video if you’re still not sure how to crochet in the back bump of a chain)
3. Make sure your work is the right size.
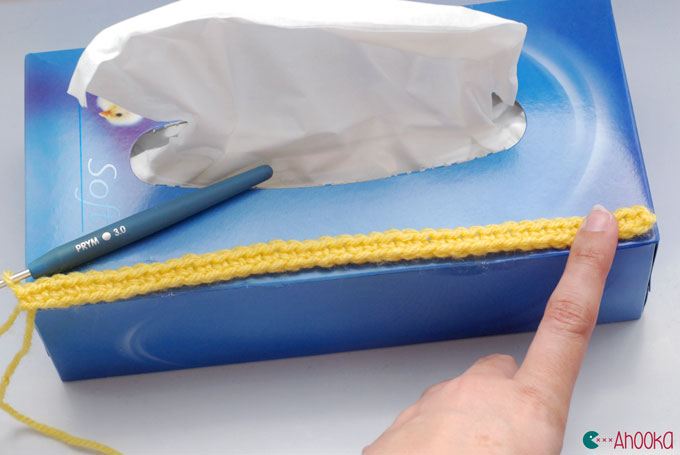
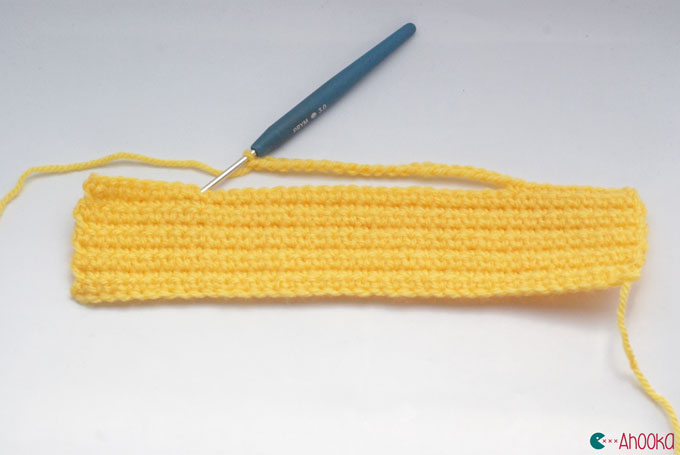
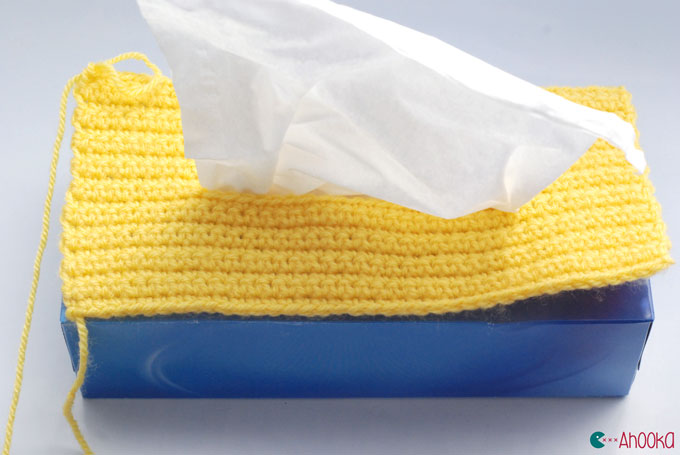
4. Go on with single crochet rows until the middle of the box.
5. Then single crochet until the box opening
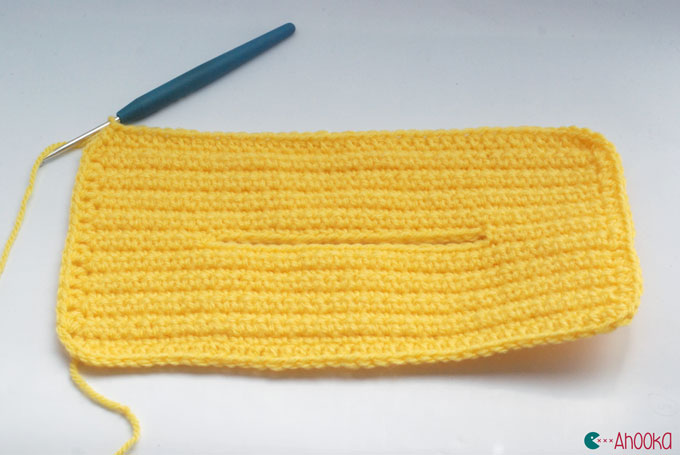
6. Make a chain the same length as the opening
7. Skip the same amount of stitches that you made in you chain, and insert your crochet hook in the next stitch. Complete the row with single crochet.
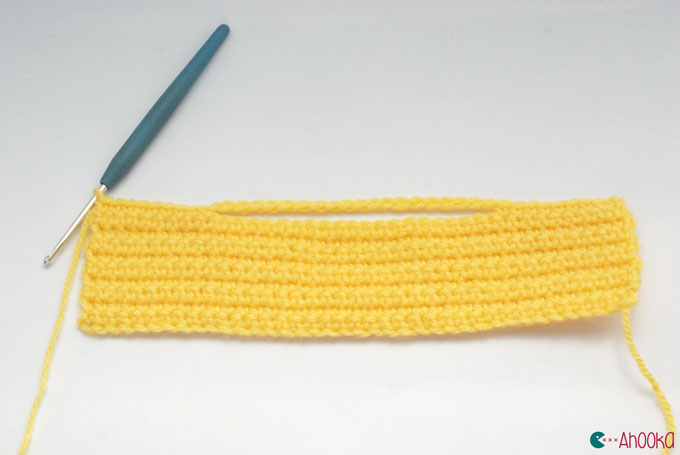
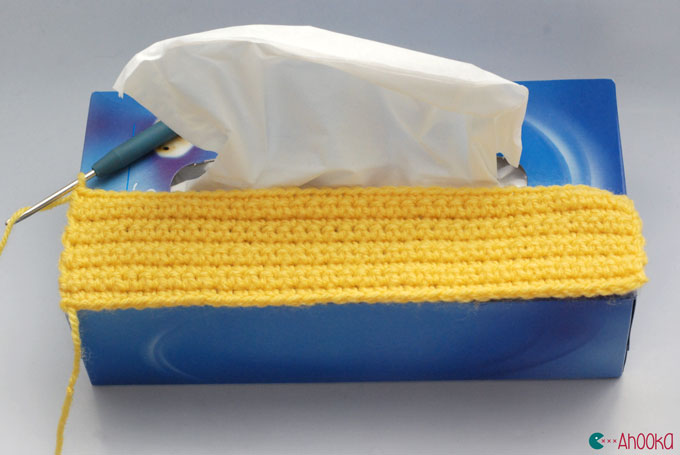
8. Go on with single crochet rows.
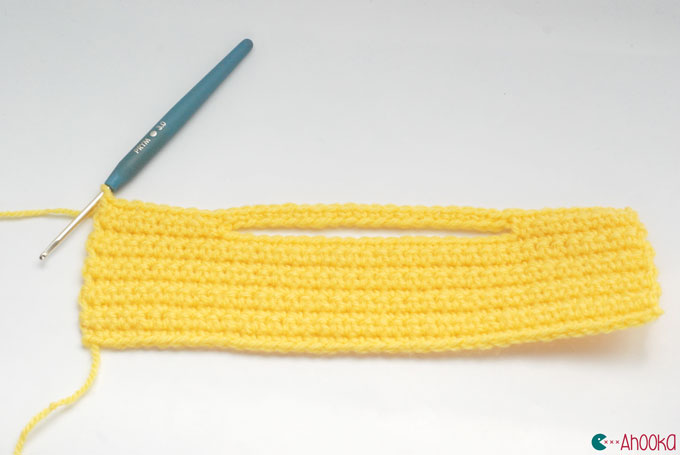
9. until the top is covered
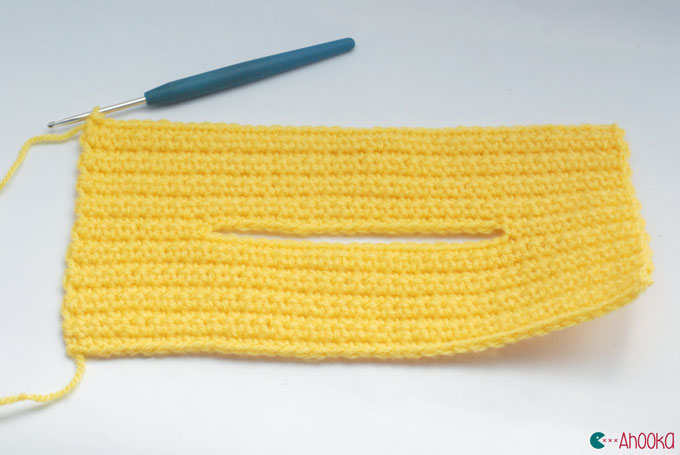
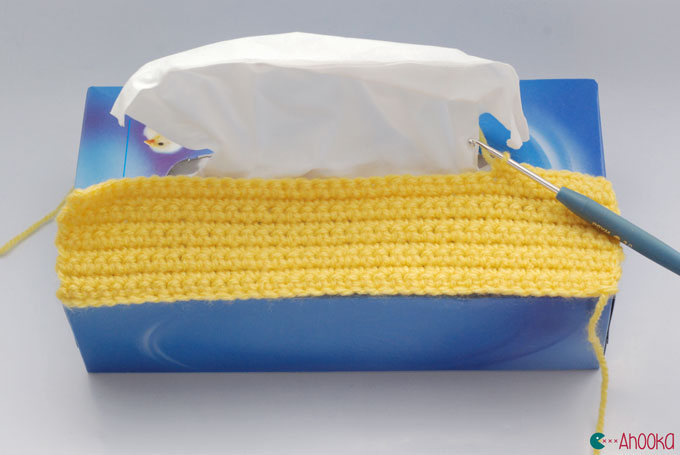
10. Now, half double crochet around the rectangle (single crochet will do too, but avoid double crochets as the box would show through)
11. Go on until your entire box is covered.
12. Now, to the little rounds :
a. Single crochet 6 in a magic circle (6)
b. Increase in every stitch (12)
c. (single crochet, increase) x 6 (18)
d. (2 single crochets, increase) x 6 (24)
Stop at b, c or, depending on the size of your yarn
e. In the back loop only, single crochet in each stitch of the previous round.
f. In both loops, single crochet in each stitch of the previous round.
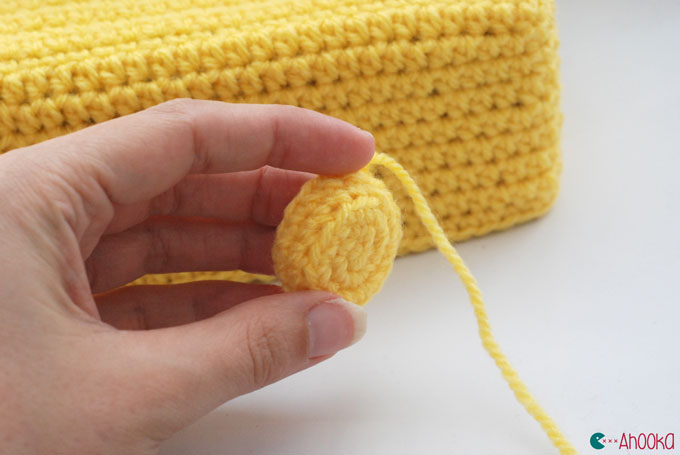
13. Pin your 8 rounds and sew them on !
Aaand you’re done!
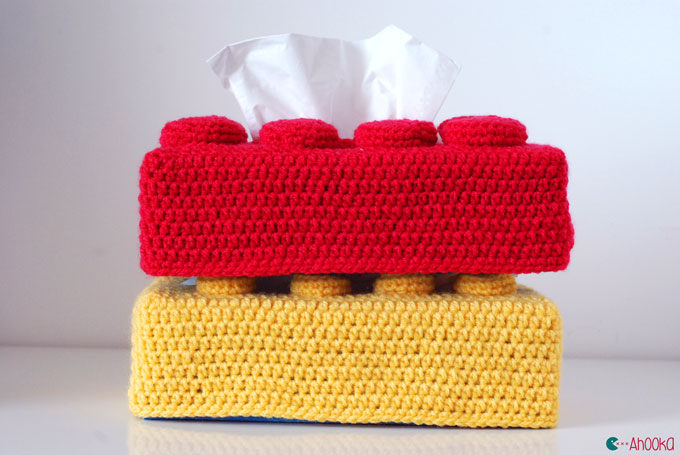
I only miss a few to make a wall :p
If you make a lego tissue box using this tutorial, I’d be glad to see it ! Feel free to post a picture on my facebook page, I’ll add it to the “made by you” album !
Thanks for a fun pattern,This is awesome and I can’t wait to try it
You’re welcome ! I’m glad you like it :)
I like this pattern.
Thank you :)
Oh boy :) I have a friend who is going to LOVVVVE these! Just wondering about the sides – we just keep half double crocheting around and around? Until the size is right? THANKYOU!!
Exactly ! :) Happy crocheting ^^
Thank you so much. I know just the person to make
this for and their Birthday is next month.
You’re welcome ! I always love handmade gifts ! I’m sure he will love it :)
Brilliant!! I have 5 sons aged from 13 to 29, who are all Lego crazy – I know what they will be getting in their Christmas stockings this year!!
Ahah ! Nice ! 5? They’ll almost be able to build a wall :D
It is a wonderful birthday gift.
I think too ;)
Thanks a lot for this fun pattern.I’m looking forward to doing it !
You’re welcome ! :)
OMG! Sorry about the allergies, but you are a crochet genius!
Ahah thank you :D
I’m a teacher and I love this! I’ll have to make a couple for my class. Thanks!
You’re welcome !! :) I would have liked a teacher like that when I was at school !! ^^
Very nice
Thanks :)
Thanks so much for this- I think I will have no problem now making one of these for my grandson!
You’re welcome ! I’m sure he will love it :)
Thank you for the nifty pattern, my kids will get a kick out of this!
You’re welcome ! Happy crocheting :)
Amazing blog!!!!! thanks a lot for sharing!!!!!
This is one of the clearest instructions I have ever seen! The gifs are easy to follow and very helpful. Thank you for the pattern! I will find my hook as soon as I finish typing this.
Thank you !! I try to do my best at making clear photos as I know my English may be a little bit rough being a French speaker :) So, I’m really glad you find those instructions that clear :)
Happy crocheting to you :)
Hey. Same Jenny. I finished making my tissue box, but my edges are a bit weird. They aren’t very well defined and have this roundish look to then. How did you get your edges to look so clean and straight?
Hi Jenny, I did nothing more or less then shown in the tutorial really, but maybe did you use a bulkier yarn? You may want to make some decreases on the sides so the fabric stays close to the box. I hope that helped !
This is awesome!!! I am so going to try it! Perfect for my boyfriend`s birthday in June. And for my bedroom. And my sister’s bedroom. And my cousin. :D Thank you so much for sharing this!
Greetings from Germany :)
Ahah :) You’re welcome ! Cheers from France :)
Hello,
I have started this pattern (and restarted, and restarted probably about 5 times) and I can’t seem to get the right size for the top of the box. I did the exact as the tutorial but with a 4mm hook, I then extended the first row longer by a few stitches then did it by about 15 stitches and the first few lines are okay but after that it shrinks. I count my stitches and they were the same amount. I am not sure what to do.
Cora
Hi Cora,
I’m sorry I don’t have a clear answer to that ! I don’t know what could cause that !
I you have the patience to give it a 6th time though, I would suggest that you start with a bigger chain (and try to keep it loose and not tight) but without adding stitches after that, the top should perfectly rectangular, and adding stitches shouldn’t be a solution.
I’m sorry if I can’t help you more than that :/
Question…not sure what you mean about making the small rounds…(c)& (d) what does (single crochet, increase) x 6 mean?? Am I adding 6 stitches in the row to make 18?? Then next row doing another 6 to make 24?? I also find making the bottom on the kleenex box, is uneven, as you are going round and round with the hdc, as you can’t join?? Please e-mail me…Thanks
(single crochet, increase) x 6 means
“make a single crochet, increase in the next stitch” and repeat those instructions 6 times (which will give you 18 stitches) in the round.
Yes, the bottom of the box is slightly uneven, that’s the major downside of crocheting in the round. But it shouldn’t show too much as you can see in the pictures.
Hi, Teresa. I think I can help with this.
Regarding (c) and (d)–
c. “(single crochet, increase) x 6 (18)” means “*two sc in first stitch, one sc in next stitch*, repeat from * to *, for a total of 18 stitches”
d. “(2 single crochets, increase) x 6 (24)” means “*one sc in each of the next two stitches, two sc in the next stitch*, repeat from * to * for a total of 24 stitches”
Regarding the bottom of the box —
When you get to the bottom of the box, you will notice that one stitch “hits” the bottom of the box exactly or very closely, but that the next stitch falls a bit below the box. Yes?
If you worked the sides of the box in hdc, THEN, when that one stitch hits the bottom of the box, you need to change the next stitch from hdc to sc. Then, crochet as many sc as will fit without going below the bottom of the box. THEN, if you need more stitches, switch to slip-stitches until the box is covered. If you worked the sides of the box in sc, then simply change to slip-stitches to finish.
Aack! Technically, the translation of (c) should read:
“ONE sc in the first stitch, TWO sc in the next stitch”.
I believe there is no harm done by starting with one sc instead of two, but if you do have any trouble later in this round or the next round, try going back and switching the beginning stitch.
Although usually I am a very good proofreader, every so often I fall smack-flat on my face. Sorry ’bout that.
Thank you for your contribution ! I think that might be helpful for a lot of people ! :)
These are adorable! Thanks for making the world a little bit nicer (and cuter)!
Ow !! Thank you so much for your nice comment :) I really love the idea of making the world a little bit cuter :p
oooooooohhhhhh…I love it…what agreat idea…I’ll make lots of it….thank you for sharing :-)
You’re welcome ! Feel free to send pictures if you make some :)
UAU!!! Well donde , thanks for sharing .I m making one for surre, Maybe 2 or 3 :)
You’re welcome ! I’m glad you like it :) Feel free to send a picture if you make one ! :)
love this! I’m having trouble with my yarn splitting using a size “D” crochet hook. could just be the type of hook. and I can’t seem to get the correct number of chains. once I start on the next couple of rows it looks like the width sort of grows. lol
did you use #4 weight yarn? I’m using Red Hear Super Saver and a size D hook. I’ve ripped it out 3 times already :-( really want to make this to go with the Lego Blanket I did. appreciate any suggestions. thanks.
Hi Diane,
My Yarn was a light worsted yarn (#3) but the yarn weight shouldn’t matter in this project.
The main issue I see in what you tell me is the size of your hook ! With a #4 weight yarn, I would rather use a G or H hook !
Plus, the fact that the width grows means that you crochet your chain too tight. You also might want to try this technique to crochet into the chain if it’s not the one you use right now as it make it more flexible : http://www.ahookamigurumi.com/en/how-to-crochet-in-a-chain-the-right-way-tuto-video/
I hope that helps !
Have a nice day !
Thank you so much.
You’re welcome !
Aaaah, thank you for this lovely pattern!
My sons both love Lego and as winter is approaching fast, this is the ideal gift!
You explained each step very well so I can adapt it to my yarn and box.
Looking forward to it!
Thank you Petra ! I’m really glad you like it, I think your sons will be thrilled with this gift :)
Thank you so much for this free pattern. My kids love Lego, I plan to make several and give some to their friends for birthday gifts. I am having some trouble getting started. Like the lady commented earlier my second row is shrinking. I was wondering if I was reading the pattern correctly. Chain the length of my tissue box then SC in second chain from hook then in every other chain? I am wondering if it is supposed to be SC in every chain instead of every other.
Jennifer
You’re totally right Jennifer, I realize now that this is a translation mistake, I should have written “and every remaining chains” instead of other ! I’m sorry about that and I’ll correct it right away !
coucou je suis bien contente !
cette boite de mouchoir lego va à ravir dans mon salon !!^^
Mes grands enfants élevés aux legos et autres jeux de construction mémorables sont fans !!! ^^
Merci et bonne année !
Génial !! Contente de son succès :p
Bonne année à vous aussi !
I know a lot of people here who would love this. I guess a crochet artist’s work is never truly done lol. I have already started a blue colored block. I’m even thinking about making lego covers for the more square-shaped boxes and put four pegs on top instead of eight. Merci du Terre-Neuve Canada! ~_^
My pleasure !! And thank you very much :)
Ive done the top section and now I’m a bit down the box but its still flat, I’ve followed your tutorial (which is great) so I don’t know what’s wrong. Can you help?
Isabel, when you are ready to do down the sides, try only going through the back loop for a row, then carry on as normal in the next, this will make the edge on the box, hope this helps, I haven’t made this yet just going through the pattern and noticed this was missing! lost in translation,good luck.
Hi would really like to make one of the Lego bricks but could you explain the small rounds I don’t understand what to do. Many thanks
Hi, love these. Want to make some. Looks easy. The only thing I don’t understand is how to make the small rounds. Can you explain it to me please?
Thank you for this Awesome tutorial!
I made one, and it turned out great.
Thanks for the lovely pattern. I have a disabled client who loves playing with Legos. This will be the perfect gift for his birthday in June. He’s has many allergies; so he has tissues everywhere also. I’m positive he will love it much better than the ugly boxes sitting everywhere. It sounds soooo simple, I’m sure I’ll love making it as well. I’m always looking for novelty ideas; but I’ve not been very successful at creating my own patterns as yet. Thank you again so much!!!
Hi Kathy! My pleasure ! That’s such a nice gift idea for him :) Feel free to send me a picture when you’re done :)
Amazing. What a wonderful work. I seek a lot of things how tissue cover box. thanks
really cute. Would like to try
This is a great idea! I’m 50+ years old and I still play with Legos because I didn’t have any as a kid, ahem! Anyway, I love the idea and I just got some really “wild” yarn with almost neon colors in it and I will start with that! Thanks for the cool pattern!
Hi! I was just wondering if I could sell the finished product? Will credit your pattern of course! Thank you and hope to hear from you soon!
Your idea is really really great and easy to follow :) thank you for sharing it with us!
Mein Enkel 9 liebt Lego er bekommt zum 10.Geburtstag einen gehäkelten von mir. Ich werde die Runden mit Füllwatte ausstopfen. Danke für deine kostenlose Anleitung.
When doing the top of the box do I turn at the ends to start the next row
Did you figure it out? I’m trying to make it too and not sure if I need to chain one at the end of each row before single crochet in the second chain from the hook. I also can’t imagine that I’m not going to end up with just a huge rectangle when it’s finished.
Oh toll da kann ich jemandem eine Freude machen vielen Dank
Thank you for the pattern. I can see me using this for presents in the coming year. I subscribed to your newsletter, but when I click on the link to confirm my email my computer, mobile and kindle Fire come up with the same result :
This site can’t provide a secure connectionbhhjhic.r.af.d.sendibt2.com sent an invalid response.
Try running Windows Network Diagnostics.
ERR_SSL_PROTOCOL_ERROR
I really do not know what to do next.
My beloved husband made Lego Robots that actually roamed the house – while he was in hospice here at home.
I just met a very nice gal whose son loves Legos and this would be great for him – along with all of my husband’s boxes of Legos and magazines, and the robots, too.
I hope your pattern does get to be on my List of FO instead of WIPs and UFOs.
Thank you so very much!
I’m not too sure about following a ‘no pattern’ but I’m not afraid to try.
My Ex boyfriend is back with the help of ____________R.buc k ler11 (( g ma i l… c o m ))..…?
I recommend salem manifest lover spell) g m ai l…c o m…………………
He will fix your relationship problem..
MY (EX WIFE) IS BACK AFTER BREAKUP.