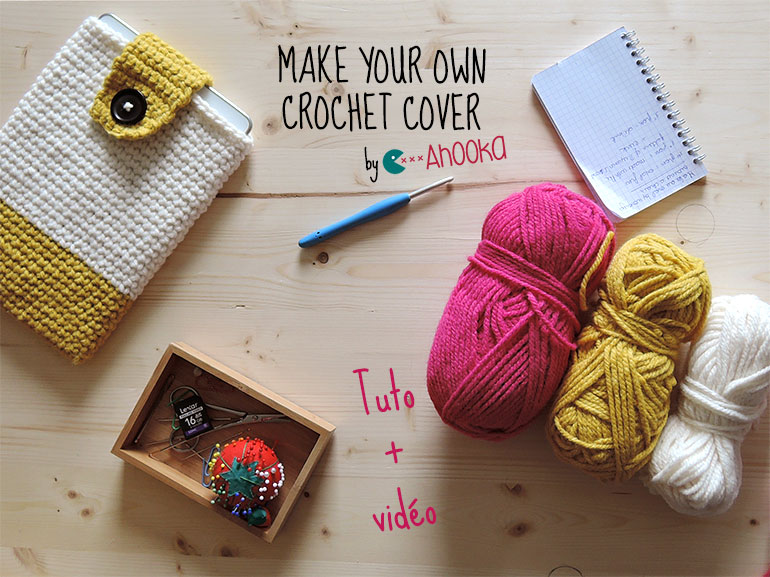
Theory is a good thing but practice is even better ! So, what about putting into practice the latest video tutorials I published? Here is a cover tutorial, adjustable to your needs and tastes : no matter the tablet, the phone, nor the yarn you want to use ! Let’s review how to crochet in a chain properly, how to crochet around a chain, how to make an invisible color change and an invisible finish :)
Material
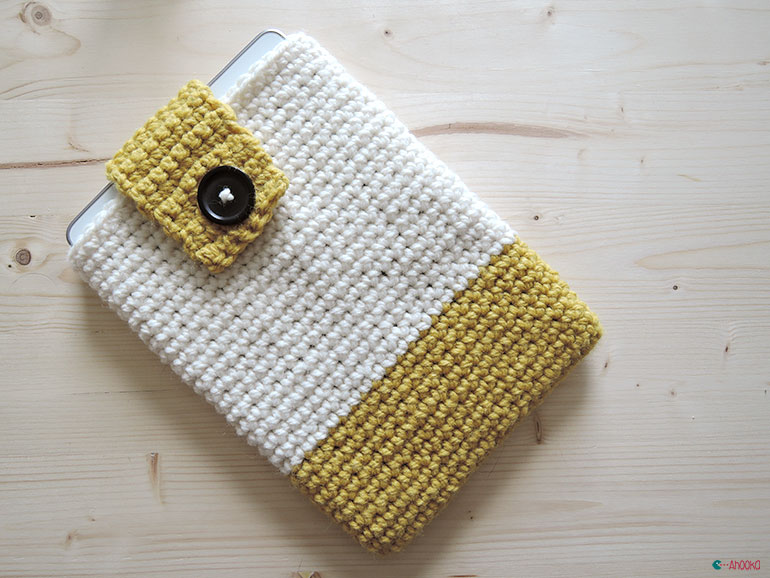
• Any yarn you’d like although I would recommend a bulky one as it will protect your tablet or phone better. As a guide, I used Katia Alaska Mustard and off-white.
• A crochet hook that matches the yarn you picked. Your stitches should be tight so you might need to pick a thinner hook than indicated on your yarn label. As a guide I used a 5.00 mm crochet hook (H).
• A yarn needle (or tapestry needle) for weaving the ends in.
• Cisors
• A big button
• 2 stitch markers (paperclips will do just fine !)

Tutorial
Each of these steps are shown in the video below. The video timing is written at the end of each steps so you can get your bearings.
1. Make a chain that fits the bottom of your tablet or phone. (0:00)
2. Single crochet around the chain, making 3 single crochets in both ends of the chain (0:50)
►[Video] How to crochet in a chain properly
►[Video] How to crochet around a chain
3. Make sure that your work is the right length by comparing it with your tablet or your phone. (2:26)
4. Single crochet in each stitch of the previous row. After 2 or 3 rows, the corners will start to show. (2:40)
5. When you’ll be ready to change color, reach one of the sides and use the invisible color change technique. (3:55)
►[Video] Color change part 1&2 : invisible finish + introducing the new color
6. Once you’ve reached the desired lenght, make an invisible finish. (7:20)
7. Divide the number of stitches you have on top of the cover by 3 to define where to attach your flap. Mark those stitches with stitch markers (I use paper clips). (9:20)
8. Insert your hook where you have inserted the first stitch marker and single crochet until you’ve reached the second one. Keep on crocheting in rows until you’ve reached the button hole location, making sure to chain one at the end of each row. (9:50)
9. In order to make a button hole, assess the amount of stitches you’ll have to skip depending on your button size. Chain that number and skip the stitches then finish the row with single crochets. (11:59)
10. Crochet in each stitches of previous row, including the chains. (13:20)
11. Sew the button in place. (14:29)
12. Add a row of single crochets if necessary. (15:10)
13. That’s it !
Video
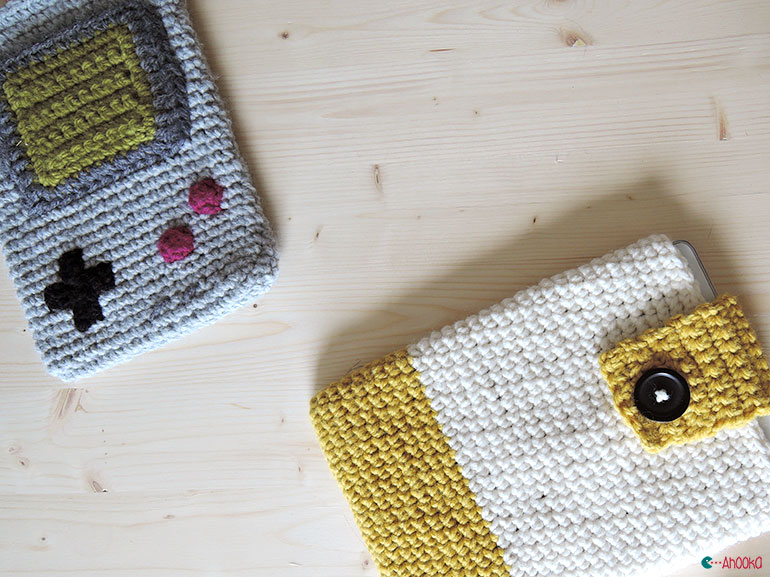
Customization
This tutorial doesn’t have any limits ! :) What about a giant Game Boy? ^^

Such a clever pattern!
Thank you !! :)
So adorable! Love the colors too :)
Thank you very much ! :)
can’t wait to get started :)
Happy crocheting then :)